


If you’ve ever adjusted a slipping strap mid-commute in Bangkok, dug a tight underband out of your ribs after a long day running errands in Chiang Mai, or noticed gaping cups after putting on a new bra, you’re not alone. Learning how to measure bra size at home takes just a few minutes, no tailor or fancy tools required, and gives you a reliable starting point to find bras that feel supportive and comfortable for your unique shape. Unlike one-size claims that work for no one, this guide uses simple, flexible steps you can do any day, in the privacy of your own home, to get baseline measurements that work across brands and styles.
Before we dive in, it’s important to note that no measurement is perfect. Bra sizing varies between brands, between styles (think a seamless t-shirt bra vs. a lacy bralette vs. a supportive sports bra), and even between different fabric cuts. Think of your measurements as a helpful starting point, not a rigid rule you have to stick to for every purchase. You don’t need any special equipment: a soft, flexible measuring tape (the kind tailors use, not a stiff construction tape) works best, and you can wear a thin, non-padded bra that feels relatively comfortable while you measure to get the most accurate read.
What you’ll need before you start
- A soft, flexible measuring tape (if you don’t have one, a length of string and a regular ruler works as a backup—just mark the string where it meets, then lay it flat to measure against the ruler)
- A mirror to check that the tape is sitting level around your body
- A notebook or phone to jot down your numbers as you go
- A thin, unpadded everyday bra (skip heavily padded push-up styles or compressive sports bras for measuring, as they can skew your bust numbers)
Step 1: Measure your band size
Your band is the part of the bra that wraps around your ribcage, and it does most of the work of supporting your bust, so getting this number right is key. A lot of common fit issues, from riding up backs to digging straps, come from a band that’s too big or too small.
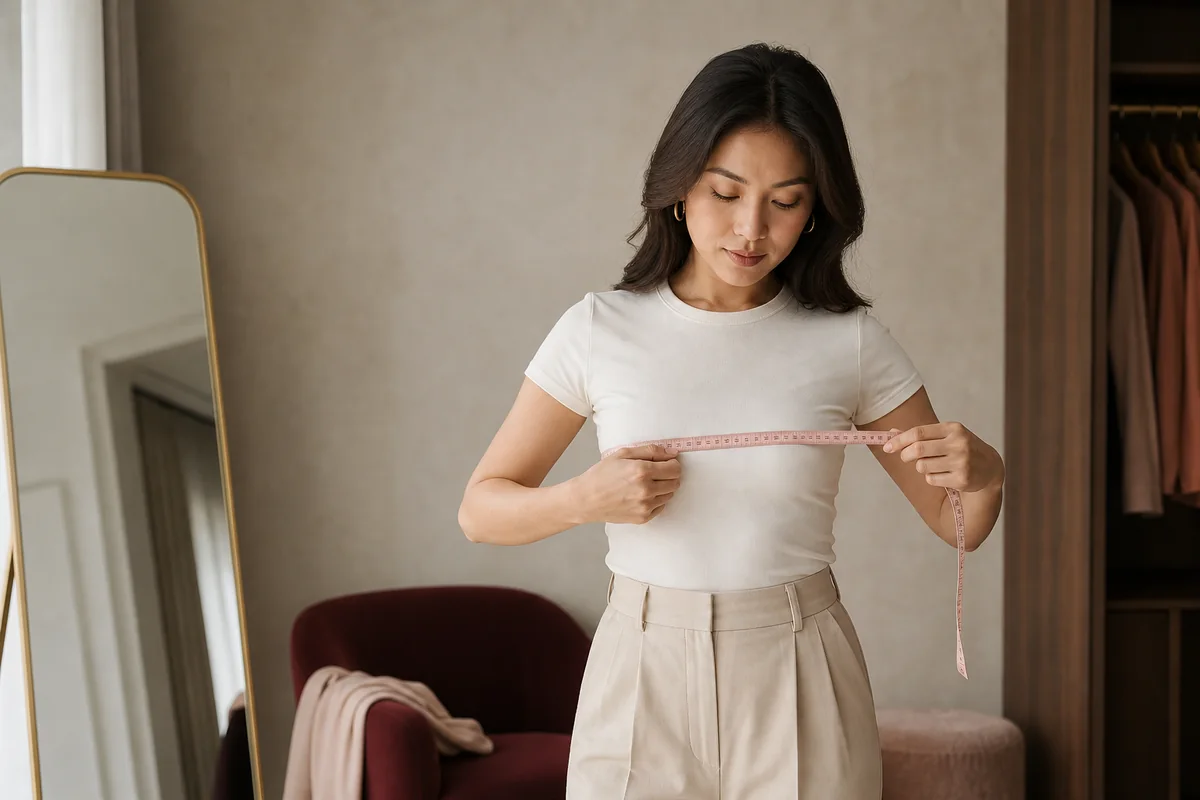
To measure, stand up straight but relaxed, with your arms at your sides. Wrap the measuring tape snugly (but not tight enough to compress your skin) around your ribcage, directly under your bust, where the band of your bra normally sits. Check in the mirror to make sure the tape is exactly parallel to the floor all the way around—if it dips down your back or rides up in front, your number will be off. Breathe out normally before taking the measurement, so you’re not holding your breath or pulling the tape too tight.
Take that number, rounding to the nearest whole number. If the number is even, that is your starting band size. If it’s odd, you can try both the size above and below as starting points—for example, if you measure 31 inches, you may find a comfortable fit in either a 32 or 30 band, depending on the brand’s stretch. Remember, bra bands stretch out over time as the elastic wears, so a snug (but not painful) fit on the loosest set of hooks when the bra is new means it will still fit well as you move the hooks tighter over months of wear.
If you are using centimeter measurements (common for many Thai shoppers), you can reference our public size guide for a starting point to convert your ribcage measurement to brand sizing, but always check individual product size notes before ordering, as conversions are never universal.
Step 2: Measure your bust size
Next, you’ll measure the fullest part of your bust to find your cup size. Keep the measuring tape level again, wrapping it loosely around your body across the fullest point of your bust—for most people, this is across the nipple line. Don’t pull the tape tight here; it should rest lightly against your skin without compressing any breast tissue, so you get an accurate read of your full shape. Again, check the mirror to make sure the tape isn’t twisted or slanted, and jot down that number to the nearest whole measurement.
Calculating your starting cup size
To get your starting cup size, subtract your band measurement from your bust measurement. The difference between those two numbers correlates to a cup size, as a general starting point. We’ve put together a simple reference table below, but remember that cup size is relative to band size—there is no universal “C cup” shape or size, as a 32C holds a very different volume than a 38C.
| Difference between bust and band measurement | Starting cup size |
|---|---|
| Less than 1 inch / 2.5 cm | AA |
| 1 inch / 2.5 cm | A |
| 2 inches / 5 cm | B |
| 3 inches / 7.5 cm | C |
| 4 inches / 10 cm | D |
| 5 inches / 12.5 cm | DD/E |
| 6 inches / 15 cm | DDD/F |
For example, if your underbust measurement is 34 inches and your bust measurement is 37 inches, that 3-inch difference puts you at a starting size of 34C. If your measurements fall between whole numbers, test both the cup size above and below when trying on styles, as fabric cut and stretch can change how a cup fits.
Step 3: Do the 3-point fit check
Even if your measurements line up with a size on a chart, the real test of a good fit is how the bra feels when you’re wearing it. These three quick checks take 30 seconds and will help you adjust or swap sizes for the best feel, no matter what the size tag says. Remember that fit is personal, and there’s no “right” way for a bra to look as long as it feels comfortable and supportive for you.
- Band check: The band should sit level all the way around your body, parallel to the floor, without riding up your back or digging into your ribcage. You should be able to slide one finger comfortably under the band at the front, and two fingers under the band at the back. If the band rides up, it is too loose and won’t give you consistent support; if it leaves deep marks or feels painful to breathe in, it is too tight. When trying a new bra, fasten it on the loosest set of hooks first—this leaves room to tighten it as the elastic stretches with regular wear and washing.
- Cup check: The cups should lie smoothly against your breast tissue without gaping at the top or sides, and without spilling over the top or under the underwire. If you notice gaping, try a smaller cup size or a different style (some plunge styles, for example, are cut for different shapes than full-coverage bras). If tissue spills over, try a larger cup size. Remember that it is totally normal for one breast to be slightly larger than the other; if this is the case, fit the cup to your fuller side, and you can adjust the straps for a little extra room on the smaller side if needed.
- Strap and center check: The straps should stay on your shoulders without digging in or slipping down, even when you move around. You should be able to slide one finger under each strap comfortably. The center gore (the small piece of fabric between the two cups) should lie flat against your sternum, not poke out or gap away from your body. If the center gore floats, you may need a larger cup size or a different style that works better for your shape.
As you shop, keep in mind that every bra style fits a little differently. A lacy unlined bralette from our lingerie sets collection will stretch more and fit more flexibly than a structured underwire t-shirt bra, while a sports bra is designed for compression and may fit tighter than an everyday bra. Different brands also use different size blocks, so never assume your size from one brand will translate exactly to another—this is why your home measurements are such a useful baseline, even when you’re trying styles you’ve never worn before. If you’re shopping for new everyday styles, you can browse our full range of everyday and special occasion bras to find cuts that match your comfort preferences.
It’s also a good idea to remeasure yourself every 6 to 12 months, or after any major life change that can shift your body shape, like weight changes, pregnancy, or changes to your regular movement routine. Your body changes naturally over time, and there is no “ideal” size to aim for— the goal is simply to find bras that feel good for you, right now. Once you find styles you love, you can make them last longer by following simple lingerie care tips to preserve elastic and fabric shape for months of comfortable wear.
When you’re ready to find your next favorite fit, start by taking your measurements using this guide, jot down your baseline band and bust numbers, and reference individual product size notes as you browse to pick your best starting size to try.
Frequently asked questions
How often should I remeasure my bra size?
It’s a good idea to remeasure every 6 to 12 months, or any time you notice your existing bras no longer feel comfortable, including after body changes from pregnancy, weight shifts, or new fitness routines.
Can I measure my bra size while wearing a padded bra?
For the most accurate starting measurement, wear a thin, non-padded, non-compressive bra while measuring. Heavily padded push-up bras or tight sports bras can skew your bust measurement and lead to a less reliable starting size.
Why do I wear a different size in every brand?
Every brand uses its own size blocks, pattern cuts, and fabric blends, so fit varies widely across labels and styles. Your measured size is a starting point, not a universal number that works for every bra on the market.
What if my band feels snug but my cups gap?
This common fit issue usually means you may need to try a smaller band size with a larger cup, or test a different bra style cut to match your shape—for example, a plunge or demi cup instead of a full-coverage style, depending on what feels most comfortable for you.
 Bra Sister Sizes: How They Work, When to Use Them, and Why Fit Still Varies
 Signs Your Bra Does Not Fit: Easy Fixes for Riding Bands, Gaping Cups, Spillage & Slipping Straps
 Bra Size Conversion Chart: Your No-Stress Guide to US, UK, EU & Asian Size Labels